
Right then, let’s talk about your loft. If you’re in Plymouth and you’ve noticed damp patches or that tell-tale black mould creeping in, it’s probably down to condensation. It’s a common issue, especially in older homes, and it can really make your place feel a bit grim. But don’t worry, sorting out your loft insulation Plymouth can make a massive difference. We’ll look at why it happens and what you can do about it.
Key Takeaways
- Condensation in your loft happens when warm, moist air meets cold surfaces, often made worse by poor ventilation. This is a big problem in Plymouth homes.
- Black mould isn’t just unsightly; it can damage your home and affect your health. It thrives in damp conditions.
- Proper loft insulation Plymouth is key, but it needs to be installed correctly alongside good ventilation to prevent moisture build-up.
- Improving airflow is vital. Check that vents aren’t blocked and consider adding more if needed.
- Fixing leaks, keeping gutters clear, and managing moisture from daily activities like cooking and showering all help keep your loft dry.
Understanding Condensation In Plymouth Lofts
Right then, let’s talk about that damp, misty stuff you might be finding lurking in your loft space here in Plymouth. It’s a common headache, especially when the weather turns chilly. You know how your bathroom mirror fogs up after a hot shower? It’s a bit like that, but in your attic. Basically, warm, moist air from inside your house finds its way up into the colder loft. When that warm air hits the chilly surfaces up there, like the roof timbers or insulation, it cools down and releases its moisture. This is condensation, and it’s a sign that something isn’t quite right with your home’s ventilation or insulation.
Why Condensation Forms In Your Loft
So, what’s actually causing this moisture to make a home for itself in your loft? It’s usually a combination of things. We’re all trying to keep our homes nice and warm, especially during those colder Plymouth months. This means we tend to keep windows and doors shut more often, and the central heating is on. This traps moisture inside the house. Activities like cooking, showering, and even just breathing release water vapour into the air. If your home isn’t well-ventilated, this moist air can travel upwards.
- Poor Ventilation: This is a big one. If air can’t escape your home easily, moisture builds up.
- Cold Surfaces: Your loft is naturally colder than the rest of your house. When warm, moist air meets these cold surfaces, condensation happens.
- Everyday Activities: Things like drying clothes indoors or even having lots of plants can add extra moisture to the air.
The Impact Of Condensation On Your Home
Now, a bit of condensation now and then might not seem like a massive deal, but if left unchecked, it can turn into a proper nuisance. That moisture doesn’t just disappear; it sits there, making things damp. This can lead to all sorts of problems, from peeling wallpaper and damp patches on your ceiling to that dreaded black mould. It can also make your home feel colder and damper, which isn’t ideal for anyone, especially if you have respiratory issues. Plus, over time, it can even start to damage the building materials themselves.
Identifying Condensation Issues
Spotting condensation isn’t always obvious, but there are a few tell-tale signs to look out for. You might notice water droplets on cold surfaces, especially in the morning. Sometimes, you’ll see damp patches on walls or ceilings, or even mould starting to appear, often in corners or behind furniture where air doesn’t circulate well. Peeling wallpaper or a musty smell are also common indicators. If you’re seeing any of these, it’s worth investigating further.
Don’t ignore those little signs. What starts as a bit of mistiness can quickly escalate into a bigger problem if you don’t get on top of it.
Effective Loft Insulation Plymouth Solutions
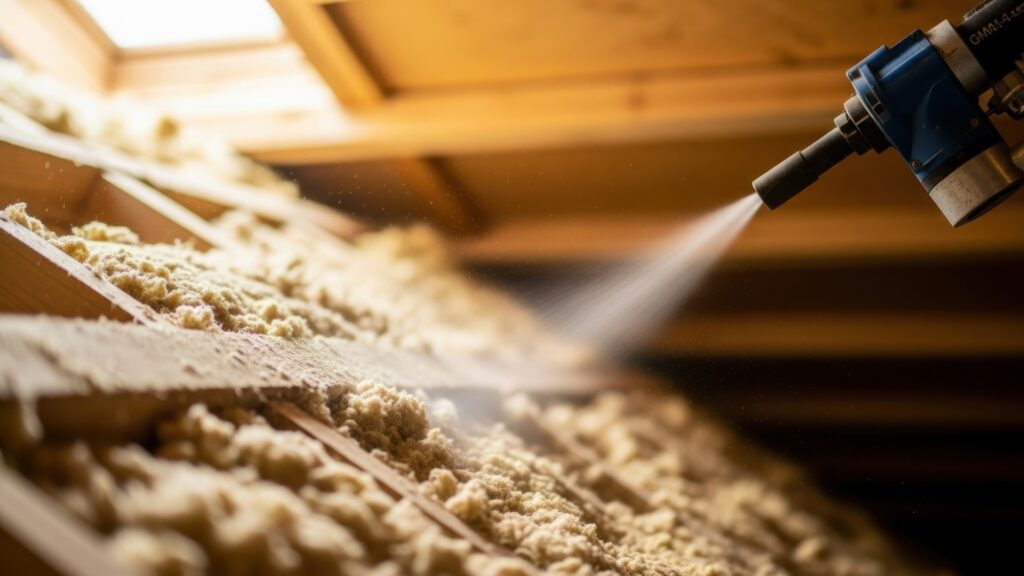
Right then, let’s talk about getting your loft sorted with some proper insulation here in Plymouth. It’s not just about keeping the heat in, though that’s a big part of it. When it comes to stopping that nasty condensation and the black mould that loves to tag along, the right insulation and how it’s put in makes a massive difference.
The Role Of Insulation In Moisture Control
Think of insulation as a bit of a barrier. It stops warm, moist air from your house from getting up into the cold loft space where it can then cool down and turn into water droplets – hello, condensation! But here’s the catch: if the insulation isn’t breathable or if it’s installed in a way that traps moisture, it can actually make things worse. The key is to manage moisture, not just trap heat. We need insulation that works with your home’s natural airflow, not against it. Getting this wrong can turn your loft into a damp haven, which is exactly what we’re trying to avoid.
Choosing The Right Insulation Materials
Not all insulation is created equal, especially when you’re battling damp. Some materials are better at letting moisture escape, which is vital for a dry loft. Others can absorb moisture, which is a big no-no.
Here’s a quick rundown of what to consider:
- Mineral Wool (Rock or Glass Wool): This is a popular choice. It’s pretty good at resisting moisture and is generally breathable. It comes in rolls or batts and is usually fitted between the joists.
- Rigid Foam Boards: These can be effective, especially if you’re insulating the roof slope itself, but you need to be careful about creating airtight seals to prevent moisture getting behind them.
- Natural Fibres (e.g., Sheep’s Wool, Cotton): These are often more breathable options, which can be a real plus for moisture management. They can be a bit pricier, though.
- Spray Foam (Open-cell vs. Closed-cell): This is where things can get tricky. While closed-cell spray foam can act as a vapour barrier, open-cell can trap moisture if not applied correctly. It’s often best to get professional advice on this one.
When you’re looking at options, think about how breathable the material is and how it will be installed. For Plymouth homes, where damp can be a common issue, breathable materials are often a safer bet. You can find out more about different types of insulation and their suitability for your home by looking at insulation and roofing solutions.
Professional Loft Insulation Installation
Honestly, this is where most people get it wrong. Just shoving rolls of insulation into your loft isn’t enough. You need to make sure:
- There are no gaps: Gaps mean heat escapes and cold air gets in, which can lead to condensation.
- Ventilation isn’t blocked: Insulation needs to work alongside good airflow. Don’t cover up vents or soffits!
- Vapour barriers are used correctly: If needed, these stop moisture from your living space reaching the cold loft.
Getting a professional in means they know exactly how much insulation to use, where to put it, and how to make sure it doesn’t cause more problems than it solves. They’ll also check for any existing issues, like leaks, before they start.
Trying to DIY this can seem like a good idea to save a few quid, but if it leads to mould and damp later on, you’ll end up spending a lot more to fix it. A good installer will make sure the job is done right the first time, giving you peace of mind and a warmer, drier home.
Ventilation Strategies For A Dry Loft
Right then, let’s talk about getting some air moving in your loft. It’s a bit like making sure your house can breathe, really. If the air gets stale and damp up there, it’s a recipe for trouble, especially with Plymouth’s weather. We need to make sure that moist air has somewhere to go.
Ensuring Adequate Airflow
So, how do we get this air flowing properly? It’s not rocket science, but it does need a bit of attention. Think about it like this: warm, moist air from your home rises. If it hits cold surfaces in the loft and can’t escape, it turns into water droplets – condensation, basically. Good airflow is your best mate when it comes to stopping this.
Here are a few things to check:
- Existing Vents: Have a look for any air bricks or vents you already have. Are they blocked by anything? Sometimes leaves, dust, or even a bit of forgotten storage can stop them from doing their job. Give them a clear-out.
- Loft Contents: If you’ve got loads of stuff piled up, it can stop air from circulating freely. Try to keep things a bit more organised and avoid packing it too tightly.
- Trickle Vents: If you’ve had new windows fitted, they might have small trickle vents. Make sure these are open and not sealed up.
Keeping air moving isn’t just about the loft itself. Think about what happens in your house too. When you’re cooking, showering, or drying clothes indoors, you’re creating a lot of moisture. Opening windows, even just a crack, in those areas helps get rid of some of it before it even has a chance to head upstairs.
Addressing Ventilation Obstructions
Sometimes, the problem isn’t a lack of vents, but rather things getting in the way. It’s surprising how often simple things can cause big issues. For instance, if you’ve got insulation that’s been put in a bit too thick, it can actually block the airflow from soffit vents (those are the ones under the eaves).
- Insulation Depth: Make sure your insulation isn’t squashed right up against the roof timbers in a way that stops air coming in from the eaves.
- Storage: As mentioned, don’t let stored items block vents or create dead air pockets.
- Chimneys and Flues: Ensure any chimneys or ventilation flues passing through the loft are properly sealed and not causing drafts or leaks that could affect airflow.
Installing Additional Roof Vents
If you’ve checked everything and still feel like the air isn’t moving as it should, it might be time to think about adding more ventilation. This is where you might want to get a professional involved, but understanding what’s available is a good start.
- Ridge Vents: These run along the very top of your roof and are pretty effective at letting warm, moist air escape.
- Tile Vents: These are individual vents that can be fitted into the roof tiles, often looking like a normal tile but with a ventilation opening.
- Soffit Vents: If you don’t have enough of these under the eaves, adding more can really help draw fresh air in.
Getting the right balance is key. Too much ventilation can make your loft cold, but too little means you’ll be battling condensation and mould. It’s all about finding that sweet spot for your specific home.
Preventing Black Mould Growth
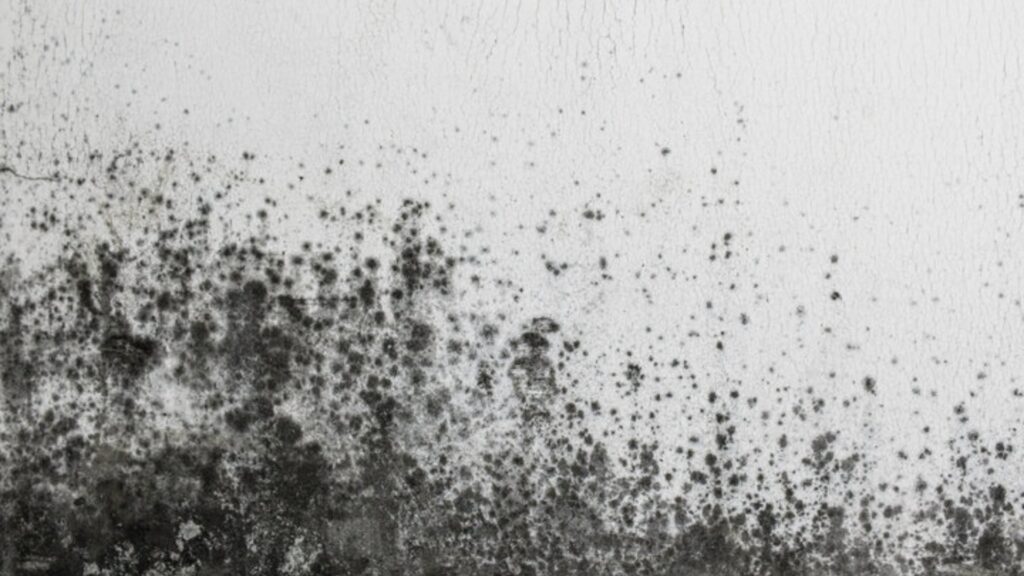
The Link Between Damp And Mould
Right, so we’ve talked about condensation, and how it makes things damp. Well, mould absolutely loves damp. It’s basically its favourite food. Where there’s moisture, mould can set up shop and start to grow. You’ll often see it in those chilly, damp corners of your loft, or anywhere air doesn’t get to move around much. It’s not just unsightly; this black mould can actually be a bit of a health hazard, especially if you’re prone to respiratory issues. The only real way to stop mould coming back is to get rid of the dampness that’s feeding it.
Treating Existing Mould Problems
If you’ve already spotted mould, don’t panic. You’ll need to tackle it head-on. First off, grab a fungicidal wash – the kind that has an approval number on the packaging. Give the affected areas a good wipe down, following the instructions on the bottle to the letter. If you’ve got any clothes or carpets that have got mildew on them, get them cleaned up too. Be careful not to brush or vacuum mould too much, as this can spread the spores around and make things worse for your breathing.
Once you’ve treated the mould, it’s a good idea to redecorate with a special fungicidal paint. This stuff helps stop mould from growing back. Just remember, it won’t work if you slap ordinary paint or wallpaper over the top of it.
Maintaining A Mould-Free Environment
Keeping your loft dry is the main game plan here. Think about where moisture might be coming from. Are there any leaks in the roof or around pipes? Are your gutters and downpipes clear? Even everyday things like drying washing indoors can add a surprising amount of moisture to the air. Try to dry washing outside when you can, or if you have to do it inside, make sure the room is well-ventilated, maybe with a window open or an extractor fan on. Also, don’t pack cupboards too tightly; air needs to circulate to stop damp getting trapped. Keeping furniture a little bit away from walls can also help air flow.
Dealing with condensation and damp is the key. If you sort out the root cause, mould shouldn’t have a chance to reappear. It’s all about keeping things dry and well-ventilated.
Here’s a quick rundown of what to do:
- Treat existing mould: Use a fungicidal wash and follow the product instructions carefully.
- Protect surfaces: After cleaning, use a fungicidal paint to help prevent regrowth.
- Reduce moisture sources: Address leaks, clear gutters, and ventilate rooms when drying clothes or cooking.
- Improve airflow: Don’t overfill cupboards and keep furniture slightly away from walls.
Addressing Moisture Sources In Your Loft
Right then, let’s talk about where all that dampness in your loft might be coming from. It’s not just about insulation and ventilation, though they’re a big part of it. We need to play detective and sniff out any sneaky sources of moisture that are making your loft a damp haven.
Checking For Roof And Pipe Leaks
This is a biggie. A leaky roof or even a dodgy pipe up there can be a constant drip, drip, drip of trouble. Over time, these small leaks can really soak into your timbers and insulation, creating the perfect conditions for mould to set up shop. It’s not always obvious, mind you. Sometimes it’s just a tiny discolouration on a joist or a damp patch on the ceiling below that you might dismiss. Keep an eye out for any water stains, especially after heavy rain.
Maintaining Gutters And Downpipes
Your gutters and downpipes are like the drainage system for your house, and if they’re blocked or broken, the water has to go somewhere. Often, that ‘somewhere’ is down the side of your house, seeping into the walls and eventually finding its way into your loft space. Think of it like a blocked sink – the water backs up! Make sure they’re clear of leaves and debris, and check for any cracks or loose fittings. It’s a bit of a chore, but a lot less hassle than dealing with water damage.
Managing Moisture From Daily Activities
This one might surprise you, but everyday things we do can contribute to loft damp. When you shower, cook, or dry clothes indoors, you’re releasing a lot of moisture into the air. If your home isn’t well-ventilated, this humid air can travel upwards. Modern, well-sealed homes are great for keeping heat in, but they can also trap moisture. So, even if your loft itself isn’t leaking, the general humidity in your house can find its way up there. It’s all about balancing that airtightness with enough airflow.
Improving Your Home’s Energy Efficiency
Right then, let’s chat about making your place a bit warmer and saving a few quid on those energy bills. It’s not just about keeping cosy, though; getting your loft sorted properly has a knock-on effect on the whole house. Think of it as a big win-win situation.
The Benefits Of Proper Loft Insulation
So, why bother with loft insulation? Well, it’s a bit like putting on a warm hat for your house. Heat naturally rises, and if your loft isn’t insulated, a good chunk of that warmth just escapes into the atmosphere. Proper insulation acts like a barrier, keeping the heat where you want it – inside your home. This means your heating system doesn’t have to work as hard to keep things toasty, which is good news for your wallet and the planet. Plus, as we’ve been talking about, it helps keep that pesky condensation at bay, stopping mould in its tracks.
Reducing Heat Loss With Insulation
When we talk about heat loss, we’re basically talking about energy escaping. Your loft is a prime spot for this. Without good insulation, you’re essentially throwing money away with every bit of heat that vanishes. Different types of insulation have different abilities to stop this heat transfer, often measured by their U-value. The lower the U-value, the better the insulation is at preventing heat loss. It’s a bit like comparing a thin t-shirt to a thick jumper on a cold day.
Here’s a rough idea of how different insulation types can impact heat loss:
| Insulation Type | Typical U-value (W/m²K) | Notes |
|---|---|---|
| No Insulation | > 0.5 | Significant heat loss |
| Basic Loft Insulation | 0.2 – 0.3 | Good improvement |
| High-Performance | < 0.15 | Excellent heat retention, often thicker |
Long-Term Energy Savings For Plymouth Homes
Investing in good loft insulation isn’t just a one-off fix; it’s a long-term strategy for saving money. Over the years, the reduced energy bills really add up. For homes in Plymouth, where the weather can be a bit damp and chilly, this makes a real difference. You’ll notice your home stays warmer for longer, meaning you might even be able to turn the heating down a notch or two. It’s a smart move that pays for itself, and it makes your home a much more comfortable place to be. If you’re unsure about the best approach for your home, getting a professional survey can be a good idea, as companies like Eco Shield can assess your specific needs.
Keeping your loft well-insulated is one of the most cost-effective ways to improve your home’s overall energy performance. It directly tackles heat loss, reduces your reliance on your heating system, and contributes to a more stable internal temperature, which in turn helps prevent condensation and mould issues.
Want to make your home warmer and save money on bills? Improving your home’s energy efficiency is a smart move. Simple changes can make a big difference, keeping your house cosy in winter and cool in summer. Ready to find out how? Visit our website for easy tips and solutions.
So, what’s the takeaway?
Right then, we’ve gone through why that damp air loves your loft and how it can lead to that grim black mould. It’s not just about keeping warm, is it? Proper airflow is a biggie, so make sure those vents aren’t blocked and maybe think about opening a window now and then, especially after a shower or when you’re drying clothes inside. If you’ve had insulation put in, double-check it’s all done right, because a botched job can actually make things worse. If you’re still struggling with damp and mould, or just not sure where to start, it might be worth getting a professional to have a look. They can spot things you might miss and sort it out properly, saving you a headache down the line.
Frequently Asked Questions
Why does my loft get so damp and steamy?
Basically, warm, moist air from your home rises up. When this warm air hits the cold surfaces in your loft, it cools down and turns back into water droplets – that’s condensation! Things like showering, cooking, and drying clothes indoors all add more moisture to the air, making the problem worse, especially if your loft isn’t well-ventilated.
Can loft insulation actually cause mould?
Not usually, if it’s put in properly! Good loft insulation is key to keeping your home warm and saving energy. But, if it’s installed badly, or if there’s already a damp problem or poor airflow, it can sometimes trap moisture. This is why sorting out any leaks or ventilation issues *before* insulating is super important.
What are the signs I’ve got condensation problems in my loft?
Keep an eye out for damp patches on walls and ceilings, especially in corners or behind furniture. You might also notice peeling wallpaper, a musty smell, or even black mould spots. Sometimes, windows can be really wet, or you might hear about issues like rot in wooden beams.
How can I stop moisture building up in my loft?
The best way is to tackle the source of the moisture and improve airflow. Make sure you’re using extractor fans when cooking or bathing, and try to dry clothes outside if you can. In the loft itself, check that vents aren’t blocked and consider adding more if needed. Fixing any roof leaks or leaky pipes is also a big help.
Is black mould in the loft dangerous?
Yeah, it can be a bit of a bother. While a little bit might not be a huge deal, mould can irritate your breathing, especially if you have asthma or allergies. It can also damage your roof timbers over time, which is definitely not good for your home’s structure.
How often should I check my loft for problems?
It’s a good idea to give your loft a quick look-over at least once a year, maybe in the spring after winter. Check for any signs of damp, mould, or leaks. If you’ve had issues before, or if you’ve recently had work done, checking more often is wise.